Enabling PlatformIO and Zephyr on custom hardware
A straightforward tutorial on adding support for a custom board that works with both Zephyr and PlatformIO
In this post, we will create a simple BLE beacon that broadcasts its name as the payload. We will use the Zephyr RTOS on a custom board based on the Nordic nRF52833 SoC. A JLink debug probe will be used for uploading and debugging our application.
Table of Contents
Prerequisites
This article uses the following components:
- VSCode with installed PlatformIO IDE extension
- Any board based on Nordic nRF52833 SoC
- Any JLink probe (used for uploading and debugging)
What is the Zephyr Project?
The Zephyr Project is a scalable real-time operating system (RTOS) supporting multiple hardware architectures, optimized for resource-constrained devices, and built with security in mind.
The Zephyr Project is perfect for building simple connected sensors, LED wearables, up to modems and small IoT wireless gateways. Because the Zephyr RTOS is modular and supports multiple architectures, developers are able to easily come up with optimal applications to meet their needs. As a true open source project, the community can evolve the project to support new hardware, developer tools, sensors, and device drivers. Enhancements in security, device management capabilities, connectivity stacks, and file systems can be easily implemented.
Zephyr RTOS has several great features that make it a good choice for developing embedded applications. The Zephyr RTOS’s goal is to establish a neutral project where silicon vendors, OEMs, ODMs, ISVs, and OSVs can contribute technology to reduce the cost and accelerate time to market for developing the billions of devices that will make up the majority of the Internet of Things. The operating system itself also has a number of powerful features, including a device model, symmetric multiprocess support, and rich networking and Bluetooth stacks.
Zephyr RTOS is open source under the Apache 2.0 license and the source code is available on GitHub.
Getting Started
Installing Nordic nRF52 dev-platform
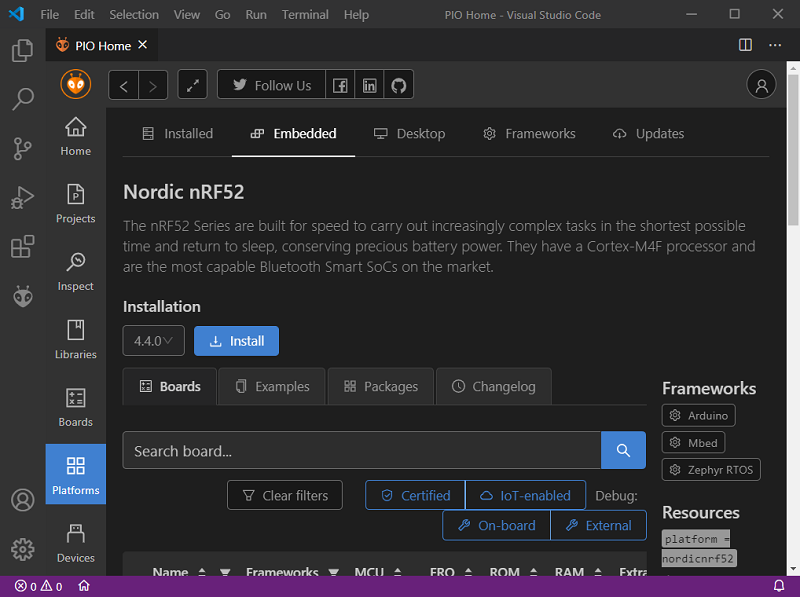
PlatformIO dev-platforms contain a lot of required information about supported packages (toolchains, SDKs, uploaders, etc), configurations for popular development boards/kits, examples. Also, all dev-platforms include predefined build scripts that help you compile, upload, and debug embedded applications. The platform can be installed automatically when you run your project the first time we can use PlatformIO Home directly in the IDE.
Alternatively, you can install the platform manually from CLI using the following command:
platformio platform install nordicnrf52
Project setup
Once the nordicnrf52 dev-platform is installed, we have everything to start developing for the Zephyr RTOS. The platform already contains a BLE beacon example that we can use as a boilerplate for our project. To import the example, open the PlatformIO Home page and press the Project Examples button in the Quick Access menu, type zephyr-ble-beacon in the input field and push the Import button:

After the successful import you should see a typical PlatformIO project with a bunch of folders and a special platformio.ini file:
project_dir
├── include
├── lib
├── src
│    └── main.c
├── test
├── zephyr
│    ├── prj.conf
│    └── CMakeLists.txt
└── platformio.ini
Besides files and folders related to PlatformIO, there is a special folder zephyr that contains Zephyr-specific files CMakeLists.txt and prj.conf, a rough description of these files is the following:
CMakeLists.txt: tells the build system where to find the other application files, and links the application directory with Zephyr’s build system. This link provides features supported by Zephyr’s build system, such as board-specific kernel configuration files, the ability to run and debug compiled binaries on real or emulated hardware, and more.prj.conf: describes application-specific values for one or more kernel configuration options. These application settings are merged with board-specific settings to produce a kernel configuration.
Since PlatformIO is able to generate CMake-based projects for certain IDEs, Zephyr-specific files are moved to a separate folder zephyr in order to avoid conflicts between CMakeLists.txt files. That requires users to specify relative paths to source files in already existing projects. After adding Zephyr-specific files, our project should look like this:
If you need more information about configuration steps, please go through the official PlatformIO configuration guide for the Zephyr project.
Adding a custom board to Zephyr
Since our board is neither directly supported by Zephyr nor by PlatformIO, we need to create the required board files manually. First, let’s add support for our board to Zephyr. There is comprehensive official Zephyr documentation on how to integrate out-of-tree board definitions. In a nutshell, the structure needed to support an out-of-tree board or SoC development is similar to how boards and SoCs are maintained in the official Zephyr tree.
Fortunately, our board uses the Nordic nRF52833 SoC that’s already supported and used in the nrf52833dk_nrf52833 board. We can use that board as boilerplate, so we just need to copy and modify the board files according to our needs. Adding a custom board is usually done using the following structure boards/<architecture>/<board_name>. Files in this folder extend the SoC configuration, apply the pin-muxing settings, and much more. A special file <board_name>_defconfig defines which SoC and basic features and interfaces are included.
Navigate to $PLATFORMIO_PACKAGES_DIR/framework-zephyr/boards/arm/nrf52833dk_nrf52833 where PLATFORMIO_PACKAGES_DIR is a special folder with all installed PlatformIO packages. Copy all files from nrf52833dk_nrf52833 folder to the zephyr folder in our project so the final path will look like zephyr/boards/arm/ble_beacon_nrf52833. Then rename the files according to our board name ble_beacon_nrf52833, the final files should look like the following:
board.cmake
Kconfig
Kconfig.board
Kconfig.defconfig
ble_beacon_nrf52833_defconfig
ble_beacon_nrf52833.dts
ble_beacon_nrf52833.yaml
After that we need to fix values in Kconfig.board, Kconfig.defconfig, ble_beacon_nrf52833.yaml, ble_beacon_nrf52833_defconfig so the Zephyr build system will be able to generate configuration and C definitions for our board.
Once the board structure is ready, we need to specify the location of our custom board information with the BOARD_ROOT parameter to the CMake build system. The easiest way is to specify this path at the top of CMakeList.txt file like this:
# Path to out-of-tree boards definitions
set (BOARD_ROOT "${CMAKE_CURRENT_SOURCE_DIR}")

cmake_minimum_required(VERSION 3.13.1)
include($ENV{ZEPHYR_BASE}/cmake/app/boilerplate.cmake NO_POLICY_SCOPE)
project(custom-board)

target_sources(app PRIVATE ../src/main.c)
Adding a custom board to PlatformIO
The next step is to add support for our board to the PlatformIO nordicnrf52 dev-platform. The easiest and most portable way to do it is to create a new folder boards in the root of our project and add a special JSON manifest file with the name of our board ble_beacon_nrf52833.json and with the following contents:
{
    "build": {
      "cpu": "cortex-m4",
      "f_cpu": "64000000L",
      "mcu": "nrf52833",
      "zephyr": {
         "variant": "ble_beacon_nrf52833"
      }
    },
    "connectivity": [
      "bluetooth"
    ],
    "debug": {
      "jlink_device": "nRF52833_xxAA",
      "svd_path": "nrf52.svd"
    },
    "frameworks": [
      "zephyr"
    ],
    "name": "BLE Beacon nRF52833",
    "upload": {
      "maximum_ram_size": 131072,
      "maximum_size": 524288,
      "protocol": "jlink",
      "protocols": [
        "jlink"
      ]
    },
    "url": "https://example.com",
    "vendor": "Vendor Name"
}
Let’s briefly go through the main parts of the above configuration: - The build section contains information about CPU architecture, framework configurations, MCU name, etc. As the variant for Zephyr, we specified the same name as the board name used in the Zephyr configuration files - The debug section sets the configuration for debug tools and the path SVD file. Since we plan to use a JLink probe, we need to specify the jlink_device name used for connecting to our board. The list of supported JLink devices can be found on the official JLink website - The framework represents is a list of supported frameworks/SDKs which can be used with our board. We plan to use only Zephyr, so we specified only one framework. - The upload section specifies maximum memory sizes and available upload protocols. We specified jlink as the protocol since we plan to use the debug probe to upload firmware to the device.
Other sections are not mandatory, but they might be useful if we decide to push our board manifest to the upstream repository to make the board publicly available for other users. More detailed information about the JSON structure of board manifests can be found in the PlatformIO Docs.
The final project structure should like this:
project_dir
├── boards
│     └── ble_beacon_nrf52833.json
├── include
├── lib
├── src
│    └── main.c
├── test
├── zephyr
│    ├── boards
│    │     └── arm
│    │          └── ble_beacon_nrf52833
│    ├── prj.conf
│    └── CMakeLists.txt
└── platformio.ini
After that we can use the new board in platformio.ini file:
[env:ble_beacon_nrf52833]
platform = nordicnrf52
framework = zephyr
board = ble_beacon_nrf52833

; Use the debug probe for uploading
upload_protocol = jlink
Note that we need to specify jlink as the upload method to force PlatformIO to use the debug probe for uploading.
Compile and Upload
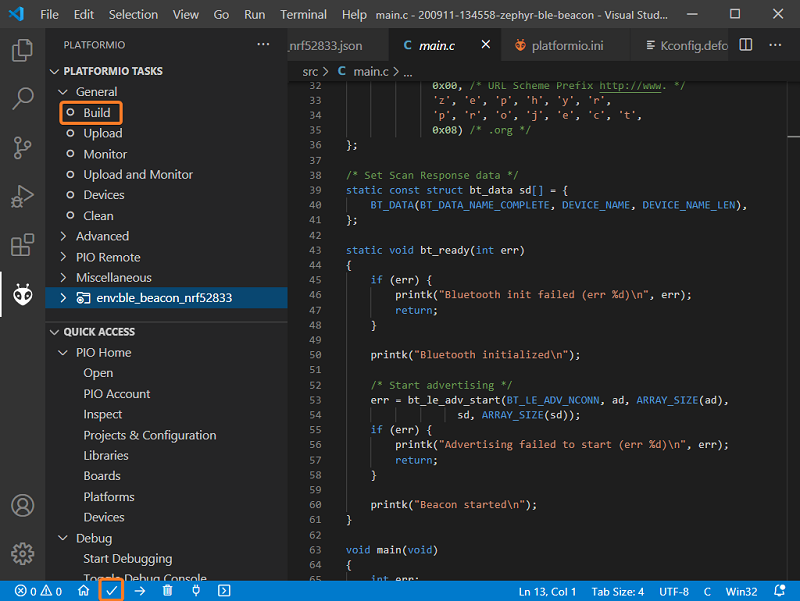
After the previous configuration steps, we are ready to compile the project. It can be done using the CLI command platformio run or via the Build button on the Toolbar:
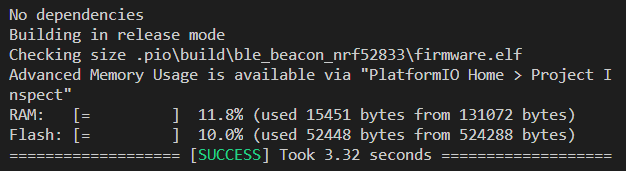
If everything went well, we should see a successful result message in the terminal window:
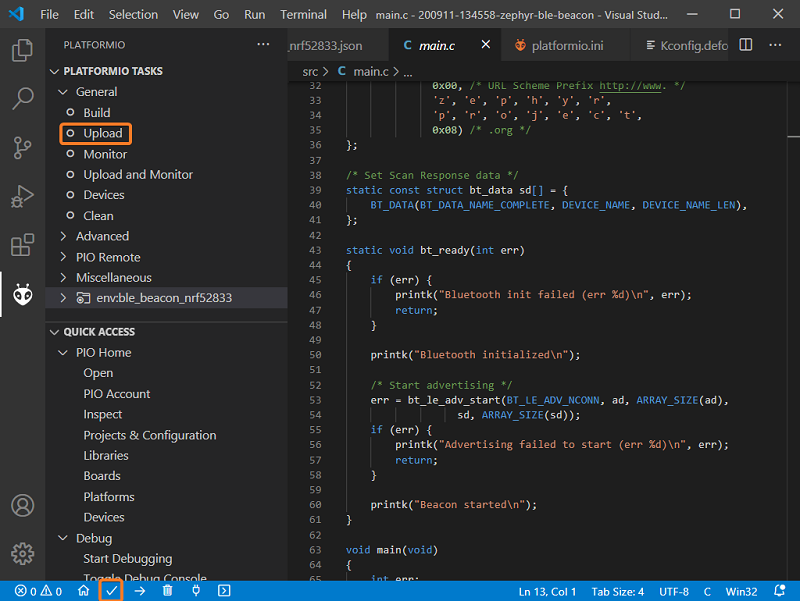
Uploading the code to the board varies across hardware platforms. As for this article, the board is connected to the computer via a JLink debug probe so it will be used to flash the firmware. Just make sure your board is connected to the computer and run the CLI command platformio run -t upload or use the Upload button on the Toolbar:
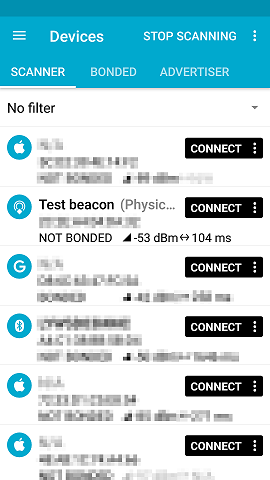
If everything went well, we can open any desktop/mobile application which is able to show near BLE devices, for example here is how the device is showed in the nRF Connect tool:
Debugging
The PlatformIO dev-platforms already have predefined configurations for popular debug probes, including the JLink probe used in this article. All we need is to specify debug_tool in platformio.ini file:
[env:ble_beacon_nrf52833]
platform = nordicnrf52
framework = zephyr
board = ble_beacon_nrf52833

upload_protocol = jlink
debug_tool = jlink
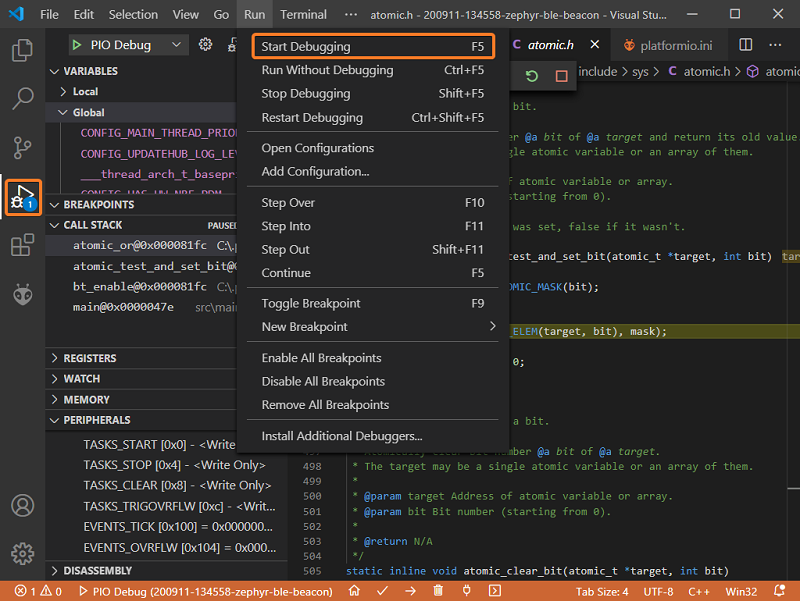
and push the Debug button. PlatformIO will do all the heavy lifting for us:
Conclusion
In this post, we went over:
- An introduction to the Zephyr project
- Setup and installation steps
- Adding a custom board to Zephyr and PlatformIO
- Compiling and uploading a simple BLE example
- Debugging the application using a JLink probe
Zephyr RTOS is a promising project with a long list of supported hardware. The active community, permissive license, comprehensive documentation, rich set of features, focus on security all this makes Zephyr a great choice for modern embedded development.
Stay in touch with us
Stay tuned to this blog or follow us on LinkedIn and Twitter @PlatformIO_Org to keep up to date with the latest news, articles and tips!